Civil 3D is a great tool. However, there are some commands and workflows that I come across during use that I think to myself "there has got to be a better way!!" One of those thoughts came to me a couple weeks ago in working with surfaces. The majority of my work is grading plans, thus I deal with a lot of surfaces. My grading plans typically consist of portions of my site (access road, pad, pits, channels, etc) all on separate surfaces, then pasted together into one compiled surface. This workflow works well when having to make modifications as you only have to work with a small area instead of a large surface.
The issue I found becomes in displaying these surfaces. The compiled surface is the one that is shown and all labels are based off of, the other surfaces are working surfaces and are only displayed when modifications are being made. Thus when coming into the drawing file I first have to turn the compiled surface to 'NO DISPLAY' then go through each of the working surfaces and turn them to a style that is displayed. Not a huge deal, but takes time and many clicks, so here's my thought - "there has to be a better way!!"
Well there is. Handle the surface displays programmatically with a new command. I'm simply calling this command 'Set Multiple Surface Styles' or from the command line, just type 'SMSS'.
Basically the command auto populates a pull down box with all the surface styles available in your current drawing and it populates a checkable list of surfaces in your current drawing. (Note: all surfaces are populated as there are four types in Civil 3D: Tin Surface, Grid Surface, Tin Volume Surface, and Grid Volume Surface.) Select the style desired and check which surfaces to apply it to, then click apply. For those that like to pick on screen, I have offered that option as well. For me personally, I've offered an expanded version of the command allowing for two different styles to be applied to surfaces all at once. (It's less clicks yet... I'm all about less clicks!!) I've also included a toolbar with a few buttons for formatting the lists; buttons include Sort, Check all, Uncheck all, and Invert Selection.
Here are some screen shots of the dialogs:
 MAIN DIALOG
 MAIN DIALOG
 EXPANDED DIALOG
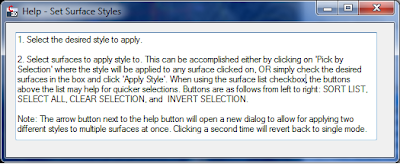 HELP MENU
As being fairly new to VB.net programming, this command was a bit difficult for me. I am currently using Civil 3D 2011, which is what the command was written in, however, it should work in older and newer versions - though it has not been tested. I initially thought I could write this command in VB.net, however the surfaces have not been fully exposed in 2011 from COM. So with a little help from JEFF_M on
www.theswamp.org, he provided me with a method to call the vb.net surface and transfer it to a COM format for applying the style. Feel free to take a look at the posting
here, if you'd like. This command opens up the door for other possibilities. I'm working on expanding the command for other style/object types and will post an updated version in the near future to look something like this:
 FUTURE VERSION FOR ADDITIONAL STYLE/OBJECT TYPES
If you like this command and would like a copy of it you can find the DLL file
here. Just type in NETLOAD in the command line and select the file. Then use "SMSS" to run the command.
If you like the command, but would like the source code for the command you can download the VB.net project
here.
Feel free to let me know what you think of it!!


